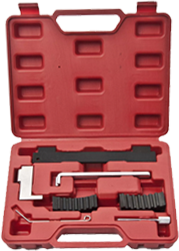
If you've ever had to change a tire yourself, you may have heard of a tire bead tool. This essential tool helps mount and demount tires with ease, making the process of changing a tire a whole lot simpler. In this blog post, we will explore the requirements, safety precautions, and a step-by-step guide for using a tire bead tool. Keep reading to learn how this tool can make your tire-changing experience more efficient and effortless.
Understanding the Basics of a Tire Bead Tool
Before using a tire bead tool, it's essential to understand its basic components and features. The tire bead tool, such as the one offered by the brand Bruide, is designed to assist in mounting and demounting tires by separating the tire bead from the rim. It typically consists of a solid metal or plastic handle, with a curved, hook-like end, called a spoon, which engages with the tire bead.
When selecting a tire bead tool, ensure it is made of high-quality materials to withstand the forces involved in tire mounting and demounting. Bruide, for instance, offers sturdy and durable tire bead tools designed for efficiency and longevity.
Safety Precautions to Consider When Using a Tire Bead Tool
While using a tire bead tool, it is crucial to prioritize safety to prevent any potential injuries. Here are some important precautions to consider:
1. Eye Protection: Always wear safety glasses or goggles to shield your eyes from potential flying debris, especially when handling the tire bead tool around the tire rim.
2. Gloves: Protect your hands by wearing gloves with good grip and adequate protection against sharp edges on the rim or any debris that may be present.
3. Proper Body Position: Maintain a stable and balanced position while working with the tire bead tool. Avoid putting additional stress on your back or limbs by using proper techniques such as squatting or kneeling.
4. Stability: Ensure the tire remains stable during the process. Secure the tire by using wheel chocks or blocks to prevent any rolling or movement.
Step-by-Step Guide on How to Effectively Use a Tire Bead Tool
Now that we understand the basics and have taken necessary safety precautions, let's dive into the step-by-step guide for effectively using a tire bead tool:
Step 1: Preparation
- Ensure the vehicle is parked on a flat and stable surface.
- Engage the parking brake and place wheel chocks or blocks behind the opposite tire.
- Use a jack to lift the vehicle and then remove the wheel.
Step 2: Mounting or Demounting the Tire
- Position the tire bead tool's spoon end between the tire bead and the rim.
- Apply firm but controlled force to pry the bead away from the rim.
- Gradually work your way around the tire, repeating the process until the entire bead is separated from the rim.
- For mounting the tire, use the tire bead tool to push and guide the tire bead over the rim until it is securely seated.
Step 3: Reinstalling the Wheel
- Carefully align the wheel with the vehicle's hub.
- Slide the wheel onto the hub and tighten the lug nuts in a star pattern using an appropriate torque wrench.
- Lower the vehicle, remove the jack, and perform a final torque check on the lug nuts.
Having the right tools is crucial when changing a tire, and a tire bead tool is an essential part of any tire-changing kit. Make sure to choose a high-quality tool like Bruide's tire bead tool to ensure efficiency and longevity. By understanding the basics, taking safety precautions, and following the step-by-step guide, you can use a tire bead tool with confidence, making the tire-changing process a breeze. So, the next time you find yourself facing a flat tire, remember to equip yourself with a tire bead tool for a hassle-free experience. Stay safe on the roads!
 EN
EN


