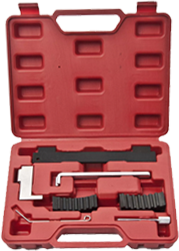
Understanding the Importance of Proper Ball Joint Installation Tools
Ball joints play a pivotal role in connecting the suspension system to the wheels, enabling smooth steering and flexibility in movement. However, the process of installing them requires precision and the right equipment. Using subpar tools may lead to improper installation, compromising the vehicle's safety and performance.
Investing in a high-quality ball joint installation tool is an investment in the reliability of your vehicle. Properly installed ball joints contribute to stability, reduce vibrations, and enhance overall driving experience. Inferior tools, on the other hand, may cause misalignment, premature wear, and even pose safety hazards.
The Key Components of an Ideal Ball Joint Installation Tool
A reliable ball joint installation tool comprises several key components. Firstly, the material quality is crucial for durability and longevity. Tools made from hardened steel or other robust alloys are better equipped to withstand the force and pressure involved in the installation process.
Ergonomic design is another essential factor. A well-designed tool ensures ease of use, reducing the risk of errors during installation. Look for features such as comfortable grips and intuitive controls to enhance user experience.
Additionally, versatility is key. An ideal tool should be compatible with various vehicle models, allowing for flexibility in its usage. This adaptability ensures that you can use the tool for different projects, making it a valuable addition to your toolkit.
Step-by-Step Guide for Seamless Ball Joint Installation
Preparation: Start by ensuring the vehicle is securely lifted and supported. Remove the wheel and any components obstructing access to the ball joint.
Extraction: Use the appropriate tool to remove the old ball joint. This may involve using a ball joint press or similar equipment to dislodge the joint from its housing.
Cleaning: Thoroughly clean the mounting surfaces to remove any debris or corrosion. This step is crucial for ensuring a secure and stable fit for the new ball joint.
Installation: Align the new ball joint with the mounting holes and use the installation tool to press it into place. Pay attention to the manufacturer's specifications for torque and alignment.
Testing: After installation, conduct a thorough inspection and, if possible, a test drive to ensure the ball joint functions correctly and the suspension system is operating smoothly.
By following these steps and utilizing the right ball joint installation tool, you can ensure a seamless and effective process, contributing to the overall performance and safety of your vehicle.
 EN
EN


