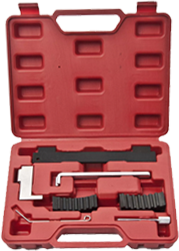
Understanding the Importance of a Spring Removal Tool
In the realm of DIY repairs and maintenance, having the right tools can make all the difference. One indispensable tool that every handy person should have in their arsenal is the spring removal tool. This tool serves a crucial role in various applications, from automotive repairs to household fixes. In this article, we will delve into the significance of a spring removal tool and explore its versatile applications.
A spring removal tool is specifically designed to simplify the process of disassembling and removing springs from different mechanisms. Springs are commonly found in various devices, including but not limited to car suspensions, brake systems, and household appliances. Attempting to remove springs without the proper tool can be a challenging and potentially dangerous task. The spring removal tool not only streamlines the process but also ensures safety by preventing accidental releases of tension stored in the springs.
Choosing the Right Spring Removal Tool for the Job
Not all spring removal tools are created equal, and selecting the right one for a specific task is crucial for efficiency and safety. When choosing a spring removal tool, consider factors such as the type and size of the springs you will be working with. Different tools are designed to handle various spring sizes and types, ranging from compression springs to tension springs.
Additionally, it's essential to look for a tool with ergonomic features that provide a comfortable grip and easy handling. Some models come with adjustable arms or jaws to accommodate different spring diameters, offering versatility in application. Investing in a high-quality spring removal tool ensures durability and reliability, making it a long-lasting addition to your toolkit.
Step-by-Step Guide to Using a Spring Removal Tool
Now that you understand the importance of a spring removal tool and how to choose the right one, let's walk through a step-by-step guide on how to use this essential tool effectively.
Step 1: Safety First
Before starting any work with a spring removal tool, ensure that you are wearing appropriate safety gear, including gloves and safety glasses. This precautionary measure is vital, as springs can be under significant tension and may pose a risk if mishandled.
Step 2: Identify the Type of Spring
Different springs require different approaches. Identify whether the spring you are working with is a compression spring, tension spring, or any other type. This knowledge will help you choose the correct method for removal.
Step 3: Position the Tool
Place the spring removal tool in the correct position, ensuring that it securely grasps the spring. Adjust the tool's arms or jaws to fit the diameter of the spring, providing a stable grip.
Step 4: Release Tension
If the spring is under tension, use the spring removal tool to slowly release it. Exercise caution during this step, as sudden releases of tension can be hazardous. Follow the tool's instructions carefully to prevent accidents.
Step 5: Remove the Spring
Once the tension is released, proceed to remove the spring from its location using the spring removal tool. Take your time and double-check that the tool is securely holding the spring throughout the process.
Conclusion:
A spring removal tool is an invaluable asset for any DIY enthusiast or professional mechanic. Understanding its importance, choosing the right tool for the job, and following a step-by-step guide ensures a safe and efficient removal process. Whether you are working on your car's suspension or tackling household repairs, having a reliable spring removal tool at your disposal will make the task at hand much more manageable.
 EN
EN


