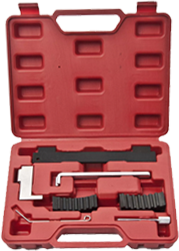
If you are a professional mechanic or a DIY enthusiast, having the right tools in your toolkit is essential. One such tool that can come in handy during various automotive repair and maintenance tasks is an axle puller slide hammer. In this blog, we will discuss how to effectively operate an axle puller slide hammer and understand its importance in the automotive industry.
Understanding the Purpose of an Axle Puller Slide Hammer
Before we delve into the details of operating an axle puller slide hammer, let's briefly understand its purpose and why it is an essential tool for mechanics. An axle puller slide hammer is specifically designed to remove stuck or stubborn axles from a vehicle. This tool is widely used when disassembling vehicles' rear axle, front axle, or even half shafts. Its strong pulling force makes it efficient in removing axles without causing damage to other vehicle components.
Preparing for Axle Puller Slide Hammer Operation
To effectively operate an axle puller slide hammer, it is crucial to gather the necessary tools and equipment and follow certain preparatory steps. Here's what you need to do:
1. Ensure Safety: Always prioritize your safety by wearing appropriate personal protective equipment, including safety goggles and gloves.
2. Positioning the Vehicle: Park the vehicle on a level surface and engage the parking brake. If needed, use wheel chocks to secure the tires to prevent any accidental movement.
3. Loosening the Axle Nut: Using the required socket and wrench, loosen the axle nut before starting the axle puller slide hammer operation. This will ease the removal process and prevent damage to the slide hammer.
Operating the Axle Puller Slide Hammer
Now that you have prepared the vehicle for axle removal let's explore the step-by-step process of using the axle puller slide hammer:
1. Select the Appropriate Attachment: Depending on the type of axle you are working on, choose the right attachment for the slide hammer. These attachments vary in size and shape to fit different axles.
2. Secure the Attachment: Attach the selected accessory securely to the slide hammer. Ensure it is tightly fastened to prevent any slippage during the operation.
3. Positioning the Slide Hammer: Position the slide hammer in a way that allows you to apply force directly on the axle. Make sure it is aligned properly to avoid any damage to the surrounding components.
4. Apply Force Gradually: Using a firm grip, pull the slide hammer towards you to apply force on the axle. Start with gradual force and increase if necessary until the axle starts to move.
5. Repeat as Needed: If the axle resists removal, repeat the process by increasing the force gradually until the axle breaks free. Sometimes, applying penetrating oil to the axle can further aid in dislodging the stubborn axle.
By following these steps, you can effectively operate an axle puller slide hammer and remove stuck or stubborn axles with ease.
Conclusion:
An axle puller slide hammer is an invaluable tool for mechanics and DIY enthusiasts alike. By understanding the purpose of this tool and following the proper operating procedure, you can safely and efficiently remove stubborn axles from vehicles. Remember to prioritize safety and always use the appropriate attachments for optimal results. With the axle puller slide hammer in your arsenal, you’ll have no problem tackling those axle removal tasks that come your way.
 EN
EN


