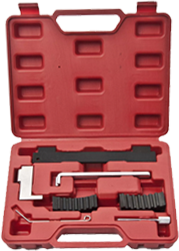
If you are involved in automotive repairs or restoration projects, you know the importance of having the right tools on hand. One such essential tool is the heavy-duty hub puller. Designed to remove stubborn wheel hubs, this powerful device can make your job a lot easier. In this blog post, we will discuss the steps involved in installing a heavy-duty hub puller and how it can simplify your repair tasks.
Understanding the Heavy Duty Hub Puller
Before diving into the installation process, it is crucial to understand the heavy-duty hub puller and its primary purpose. This tool is specifically designed to remove hub assemblies from vehicle wheels. It helps eliminate the need for excessive force or potentially damaging techniques, making it a must-have tool for any automotive enthusiast or professional mechanic. With its sturdy construction and robust features, the heavy-duty hub puller offers a reliable solution for removing even the most stubborn hubs with ease.
Gathering the Required Tools and Materials
To begin the installation process, gather the necessary tools and materials. Besides the heavy-duty hub puller itself, you will also require a socket and ratchet set, a breaker bar, penetrating oil, and a rubber mallet. It is essential to have all these tools readily available to ensure a smooth and efficient installation.
Preparing the Vehicle and Wheel
Before using the heavy-duty hub puller, it is crucial to prepare the vehicle and wheel for the installation process. Ensure that the vehicle is parked on a level surface and the emergency brake is engaged. Additionally, locate the wheel with the hub assembly that needs to be removed and secure the vehicle with jack stands for additional safety. Make sure to loosen the lug nuts on the wheel to be ready for removal before proceeding.
Installing the Heavy Duty Hub Puller
Now that you have everything prepared, it's time to install the heavy-duty hub puller. Begin by placing the hub puller over the wheel hub and aligning it correctly. The puller should fit snugly around the hub assembly. Then, using the socket and ratchet, secure the puller bolts onto the wheel studs. Tighten them evenly to ensure a secure fit.
Removing the Wheel Hub Assembly
Once the heavy-duty hub puller is securely installed, it's time to remove the wheel hub assembly. Begin by spraying a generous amount of penetrating oil around the wheel hub to loosen any rust or debris. Next, use the breaker bar to apply even pressure to the puller bolts. Slowly and steadily, turn the breaker bar counterclockwise to tighten the puller and apply pressure to the hub assembly. Over time, the hub assembly will begin to loosen, making it easier to remove. Lastly, use a rubber mallet to tap the hub assembly out, if necessary.
Conclusion:
Installing a heavy-duty hub puller is a straightforward process that can revolutionize your automotive repair tasks. By following the steps outlined in this blog post, you can efficiently remove stubborn wheel hubs without risking damage to the vehicle or using excessive force. Investing in a high-quality heavy-duty hub puller, such as the one offered by Bruide, ensures you have the right tool to tackle any repair or restoration project. So, equip yourself with the heavy-duty hub puller and experience the convenience it brings to your automotive work.
 EN
EN


