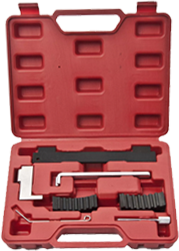
Welcome to the Ball Joint Removal Tool Novice Manual, where we will delve into the various aspects of using Bruide's high-quality tools to enhance your automotive repair and maintenance experience. In this blog, we will discuss the significance of a ball joint removal tool, guide you through the selection process, provide easy-to-follow steps on how to use the tool effectively, and offer tips on maintaining its longevity.
Understanding the Importance of a Ball Joint Removal Tool
Ball joints are vital components of your vehicle's suspension system, responsible for connecting the control arms to the steering knuckles. Over time, due to continuous use and wear, ball joints can deteriorate, leading to compromised safety and poor vehicle performance. That's where a ball joint removal tool comes into play. This handy tool enables smooth and efficient removal of worn-out or damaged ball joints, simplifying the repair process and ensuring optimal vehicle performance.
Choosing the Right Bruide Ball Joint Removal Tool for Your Needs
When it comes to selecting the perfect ball joint removal tool, Bruide offers a range of innovative and reliable options. Consider the following factors before making your decision:
1. Compatibility: Ensure the tool is suitable for your specific vehicle make and model. Bruide provides a comprehensive range of tools designed to fit various makes and models, assuring precision and compatibility.
2. Quality: Bruide is known for manufacturing high-quality tools that offer durability and performance. Look for ball joint removal tools made from robust materials that can withstand the rigors of use.
3. Ease of Use: Opt for a Bruide tool that incorporates user-friendly features such as ergonomic design, non-slip grip, and clear instructions for hassle-free operation.
Step-by-Step Instructions on How to Use a Bruide Ball Joint Removal Tool
Now that you have chosen the perfect Bruide ball joint removal tool for your needs, let us walk you through the process of effectively utilizing the tool:
Step 1: Safety Comes First: Ensure you are wearing appropriate protective gear, such as gloves and safety goggles, before starting the removal process.
Step 2: Positioning: Safely elevate your vehicle using a jack stand and locate the ball joint you need to remove. Make note of any obstruction that may impede tool access.
Step 3: Tool Setup: Prepare your Bruide ball joint removal tool according to the manufacturer's instructions. This may involve adjusting the tool's size or positioning based on the specific ball joint design.
Step 4: Loosening the Ball Joint: Utilizing the Bruide tool, apply pressure to the ball joint to separate it from the control arm or other connected components. Use controlled force to avoid damaging the surrounding parts.
Step 5: Complete Removal: Once the ball joint is loosened, continue applying consistent force until it separates completely.
Maintaining and Caring for Your Bruide Ball Joint Removal Tool
To ensure the longevity and optimal performance of your Bruide ball joint removal tool, consider the following tips for maintenance:
1. Clean and Lubricate: After each use, clean any debris or dirt from the tool and apply a thin layer of lubricant to prevent rust.
2. Store Properly: Keep your Bruide tool in a dry and secure place to avoid moisture damage or accidental mishandling.
3. Periodic Inspections: Regularly inspect the tool for any signs of wear or damage. Replace any worn-out or broken parts promptly to maintain the tool's performance.
With Bruide's innovative and dependable ball joint removal tools, even novice mechanics can achieve professional results. By understanding the importance of the tool, selecting the right Bruide product, following step-by-step instructions, and maintaining the tool's longevity, you can confidently tackle ball joint removal with ease. Invest in Bruide's quality tools to enhance your automotive repair and maintenance experience today!
 EN
EN


